https://www.youtube.com/watch?v=3X2aQIMx5bs
Turned out to be pretty easy. Here are the steps.
(1) Start with a triangular prism. You can do this by hitting Ctrl+N (or "File->Polyhedron List" from the menu), then typing "3.4.4", ie the sequence of faces around a vertex (or just find it in the library), and hit Enter.
(2) Subdivide the faces. "Poly->Subdivide Faces" and enter "2".
(3) Change the right-hand view to Faceting Preview. Enter Faceting mode. And start faceting faces: shift-left-click on each vertex of a new face and when done, do shift-right-click.
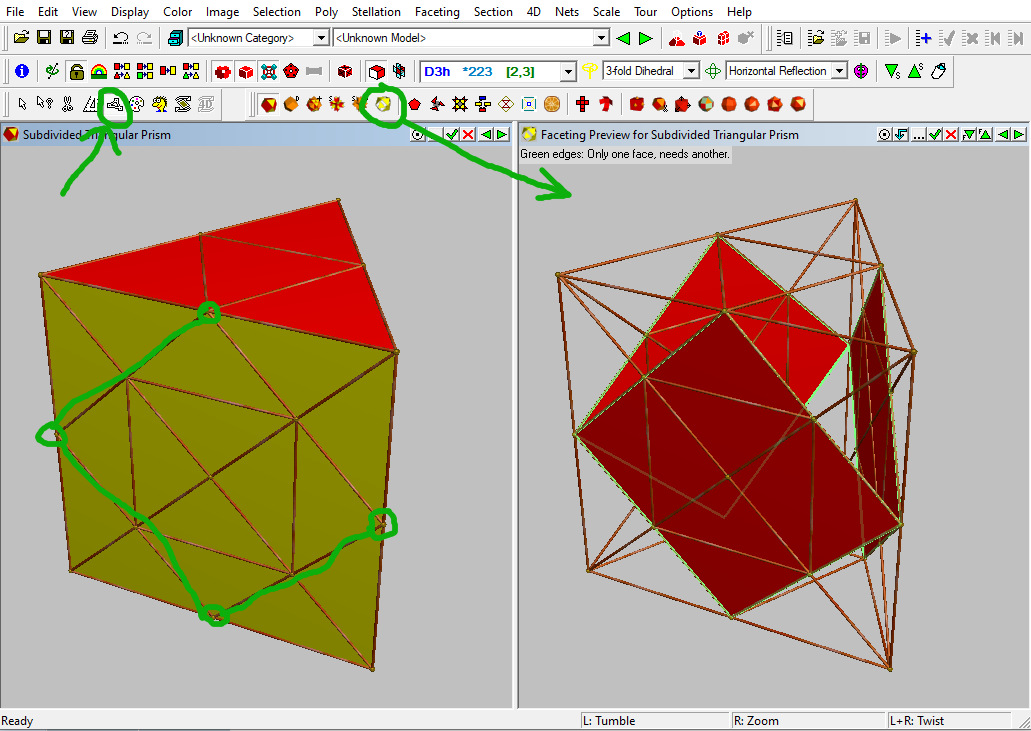
(4) Finish creating facets for all the new faces. Don't worry about the points at the top and bottom, they'll be cut off for now.
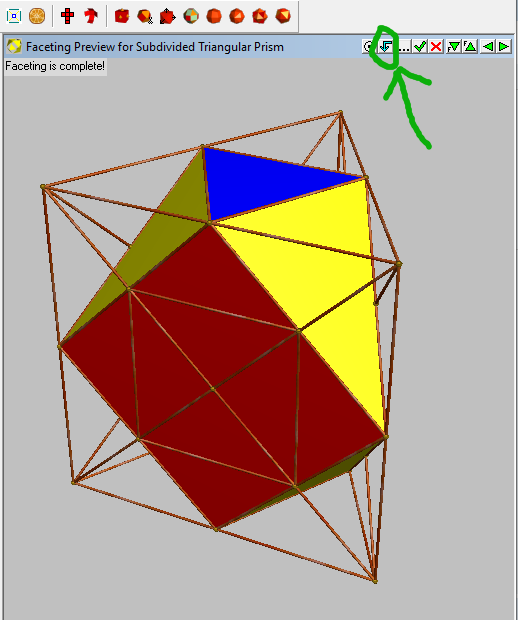
(5) Make it the new base model.
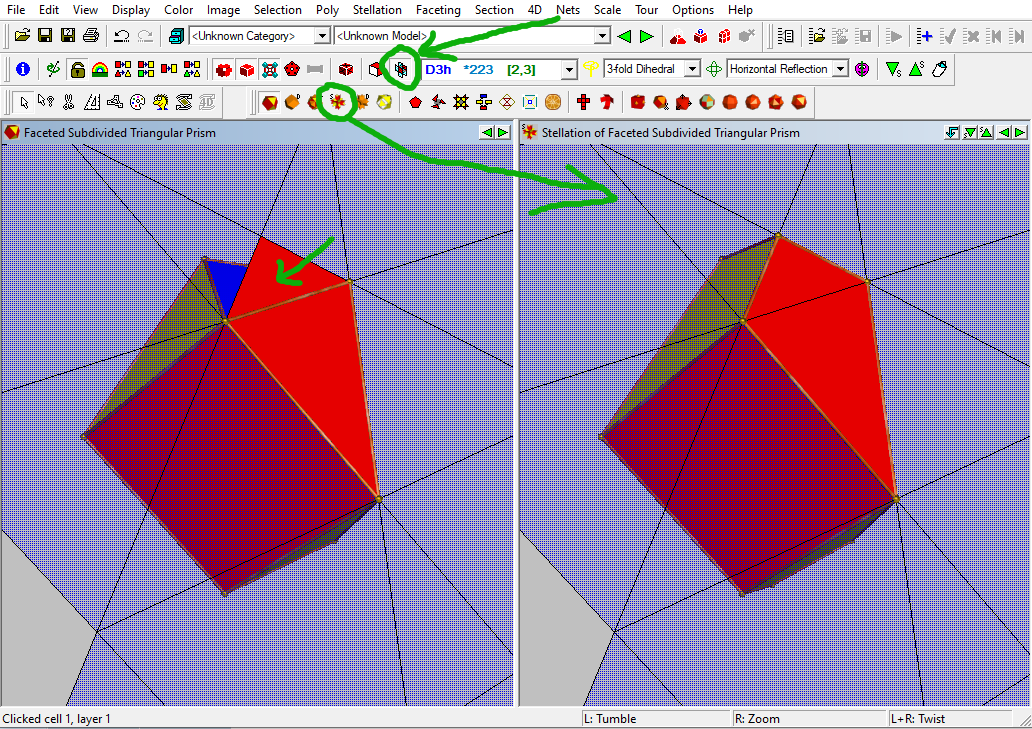
(6) Change the right-hand view to a stellation view. We can add a stellation cell at the top to get the extra point we need. Hit Escape to exit Faceting mode, then shift-left-click on the isosceles triangle face to select it. Choose the option to show the stellation diagram on the selected face. Then you just need to select one stellation cell by shift-left-clicking as shown below.
(Just realised steps 2 to 6 can be done more simply by making the right-hand view a "Morph Duals by Truncation" view, which will immediately have what we want. Just make it the new base model).
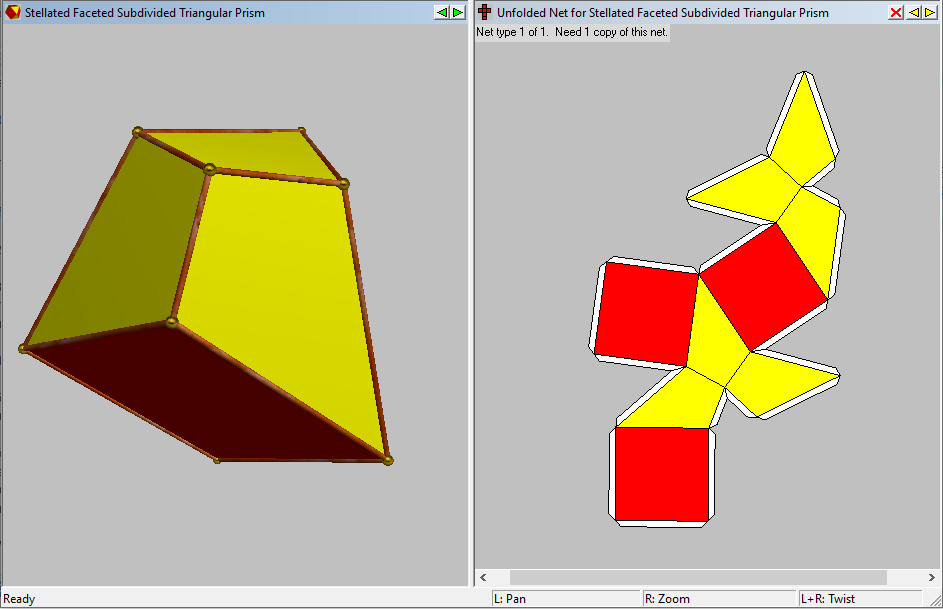
(7) Again, make the stellation view the new base model and we're done. Change the right-hand view back to the unfolded net view, and Stella is ready to print out the nets for a paper model.